 BlueBubbles
Standard Installation Guide
Get BlueBubbles running in just a few short steps!
Server Installation
-
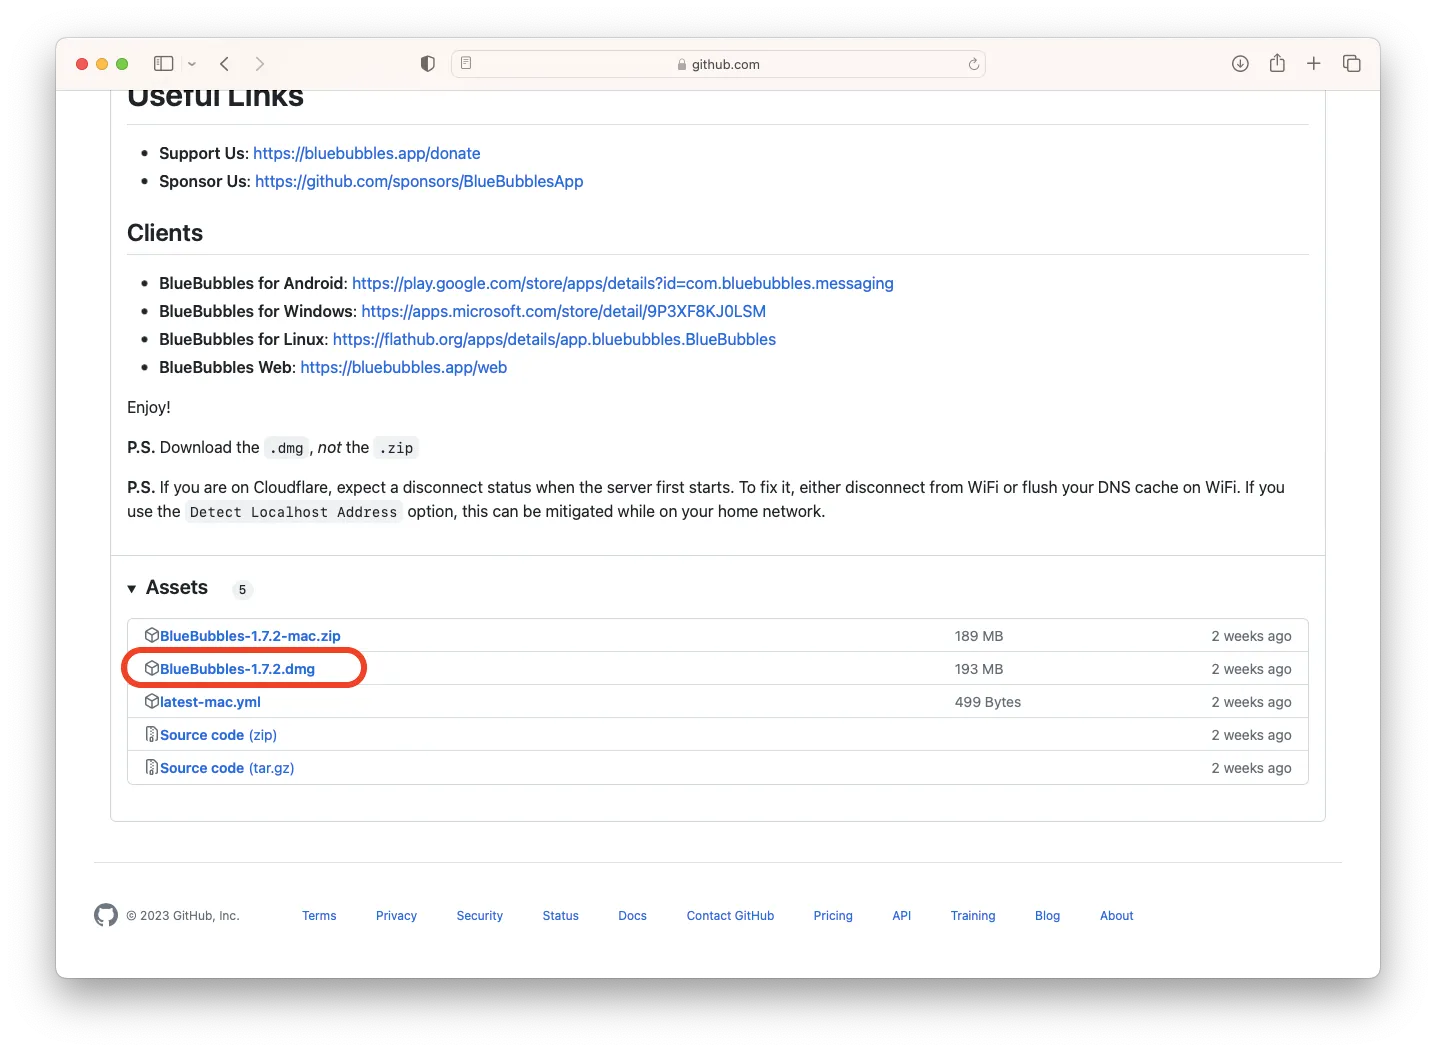
On the macOS device you'd like to use for the server, open the server GitHub. Scroll to the bottom and download the .dmg file.
-
Visit your Downloads folder in Finder. Locate the downloaded .dmg and right click (or Ctrl + Left click) the item to Open it. NOTE: Do not access the downloaded .dmg from the Downloads Center on the Dock!
-
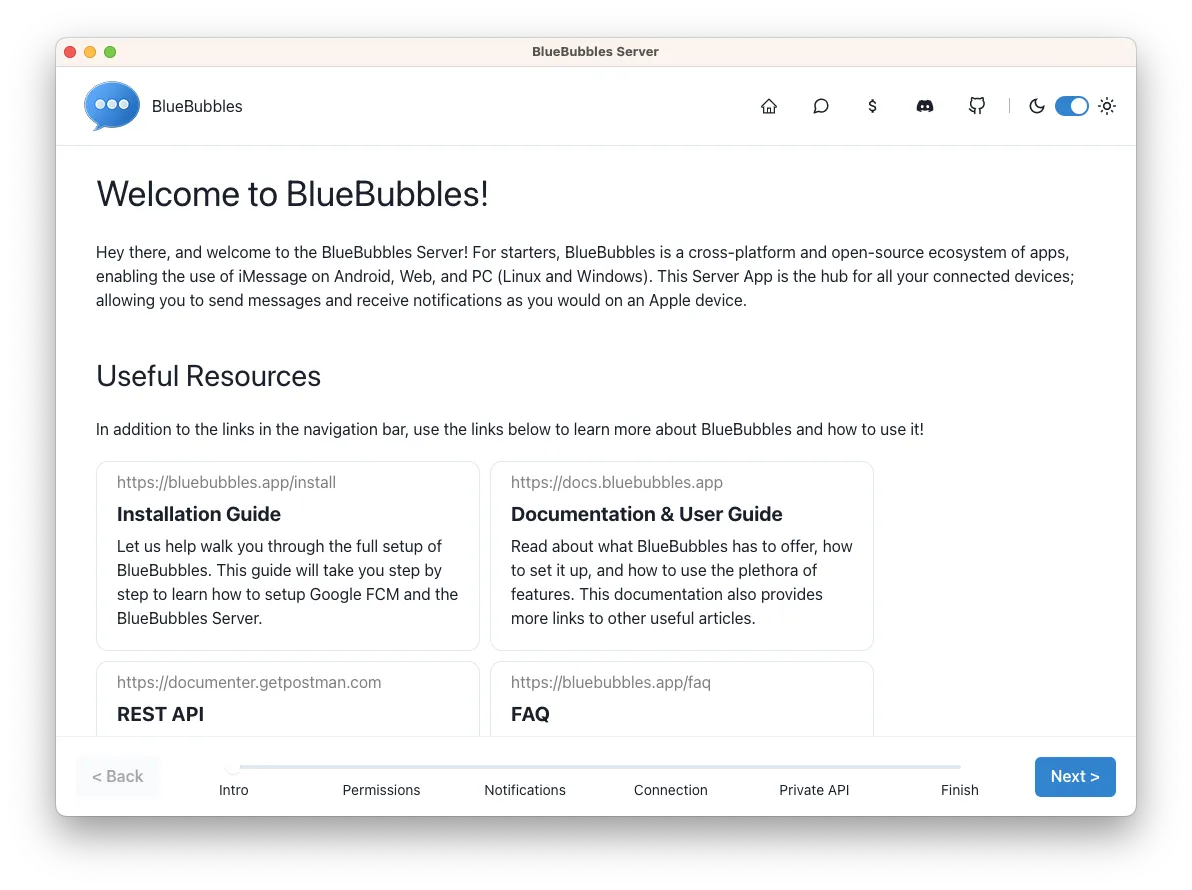
Drag the app icon to the applications folder when prompted. Right click (or Ctrl + Left click) the popup to Eject it. Finally, open the app from the applications folder, and you will be greeted with the welcome screen.
-
Proceed through the Intro, and Permissions steps, following the on-screen guide to enable accessibility and full disk access. Note that accessiblity is not required for BlueBubbles to function.
-
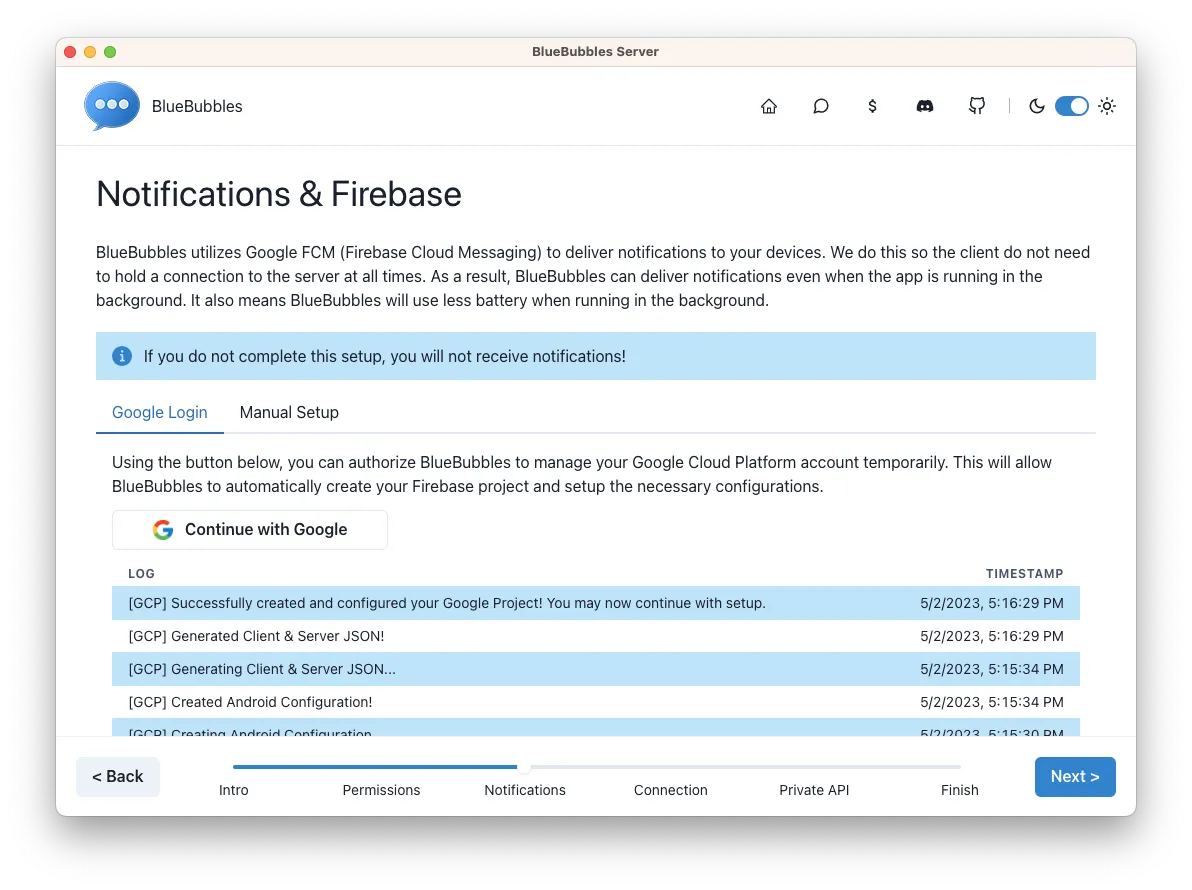
Once full disk access is enabled, proceed to the Notifications step. Connect your Google account so we can provision a Firebase project for notifications.
-
You may configure Notifications via Google Firebase either automatically or manually. Use the "Continue with Google" button to automatically provision your Firebase project.
-
During the setup process, you may get a popup taking you to the Firebase Project Creation Page. You might need to accept a terms of service popup, or manually use the "Create a project" button to create your project.
-
If you used the "Create a project" button, click on the "name" field and select the "BlueBubbles" project. Click through the remaining screens to proceed. Then close the popup window.
-
Wait for the project creation to finish, as indicated in the logs below.
-
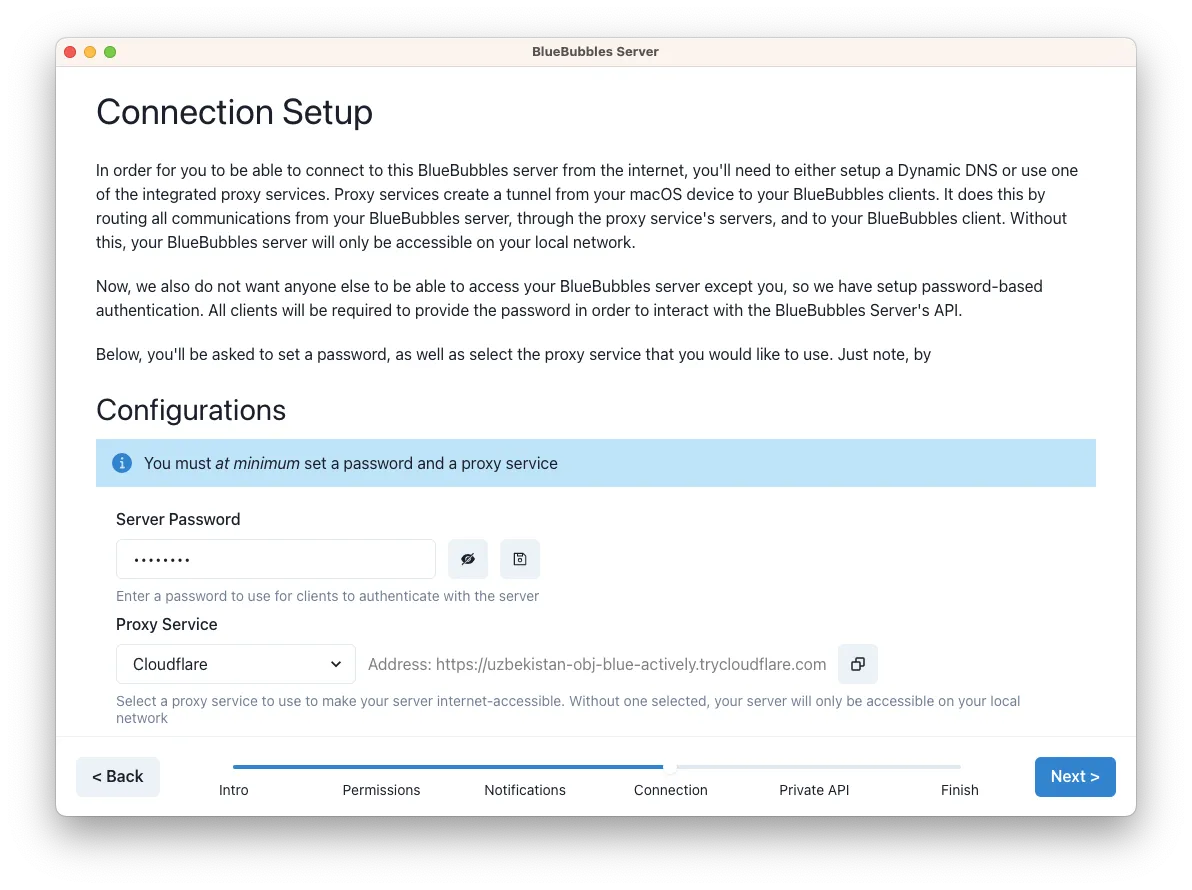
Proceed to the Connection step and add a strong server password. Make sure to use the floppy disk icon to save it.
-
In most cases, Cloudflare is the proxy service you should use. If you experience any issues with it, visit our Discord for troubleshooting instructions.
-
(OPTIONAL) Proceed to the Private API step and complete the setup using our guide.
-
Finally, finish the server setup and make any customizations you would like.
Client Installation
-
Download and install the app for your desired device from the downloads page.
-
Open the app and follow the setup flow. Make sure to grant permissions and disable battery optimization when needed.
-
Sign in with your Google account to easily find your server, or alternatively use the manual entry options.
-
Sync your messages, and you're ready to use BlueBubbles!
-
If you had any trouble or need to ask a question, please visit our Discord for quick assistance.
Manual Installation Guide
Looking to set up without logging into your Google account? Please follow our (longer) manual setup guide.